Steps involved in Smear Microscopy
ContentSputum smears must be prepared promptly after samples are collected or received in the laboratory.
Steps in smear preparation are as follows:
- Cleaning and Labelling of slide (No 1)
- Making the smear (No 2-3)
- Drying and Heat fixing the smear (No 4-5)
- Staining and counterstaining the smear (No 6- 12)
- Examination of slide/Reading the Smear (No 13-14)
- Reporting and recording the observations (Digitally and TB Lab register)
- Storage of slides (as per Laboratory Numbers in closed box) (No 15)


Figure: Steps in Smear Preparation; 1- Labelling of the slide, 2- Using a broomstick to pick up purulent portion (A) while avoiding the salivary portion (B), 3- Spreading sample on a glass slide, 4- Air-drying the slides, 5- Heat-fixing the smeared slides,6- Staining with 1% Carbol fuchsin, 7- Heating of stained smear, 8- Decolorize with 25% Sulphuric acid, 9- Rinse off decolourizer, 10- Counter stain with 0.1% Methylene blue, 11-Rinse off counter stain, 12-Drying the prepared slide, 13-14 Examination of smears , reporting of observations, 15-Storage of slides; Source: Laboratory Diagnosis by Sputum Smear Microscopy.
Resources
- Laboratory Diagnosis by Sputum Smear Microscopy - The Handbook, GLI, 2013.
- Module for Laboratory Technicians, CTD, 2005.
Question Answer 1 Answer 2 Answer 3 Answer 4 Correct answer Correct explanation Page id Part of Pre-test Part of Post-test Sputum smears should be dried by heating. True False 2 Sputum smears should be air-dried. Yes Yes Clean, fresh, unscratched slides should be used for smear preparation.
True False 1 Prevents deposits on stained smear. Yes Yes Cleaning and Labelling Slide
ContentA Laboratory Serial Number is assigned to each presumptive TB patient who is examined at the microscopy centre.
Each Laboratory Technician (LT) needs to ensure that all the slides are labelled using the Laboratory Serial Number. This is essential for recording as well as for the review of the slide during the supervisory visit as well as during the quality assurance exercise.
For every test, a new slide needs to be used. It is essential that there are no fingerprints or any scratches on the side of the slide (see figure 1).

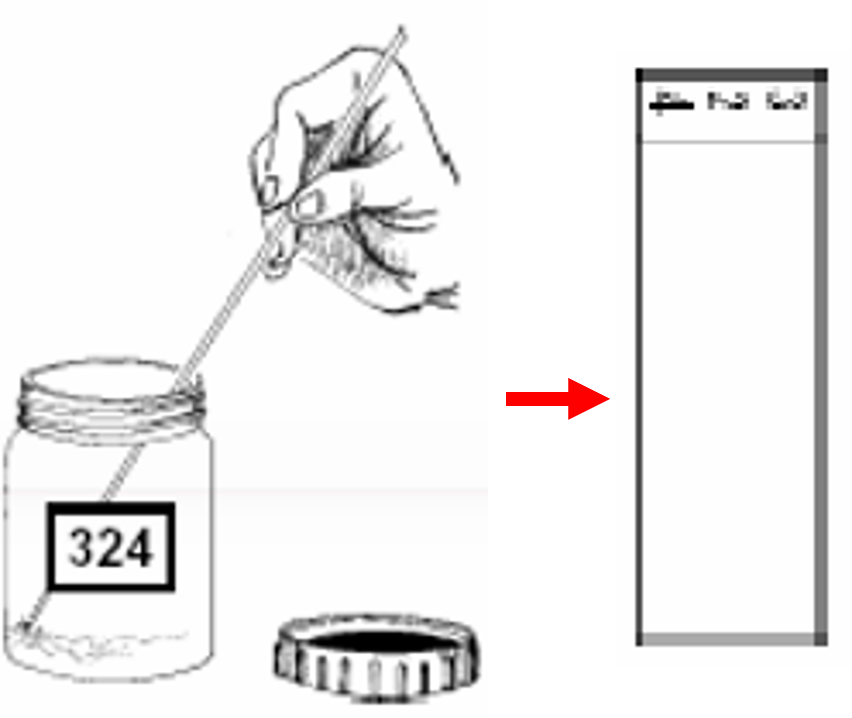
Figure 1: Always select new, clean, grease-free and unscratched slides
Once the LT is ready to prepare a smear, he/she needs to write the Laboratory Serial Number on the left side of the slide with a diamond marker or a grease pencil only (see figure 2). Avoid multiple labelling (see figure 3).
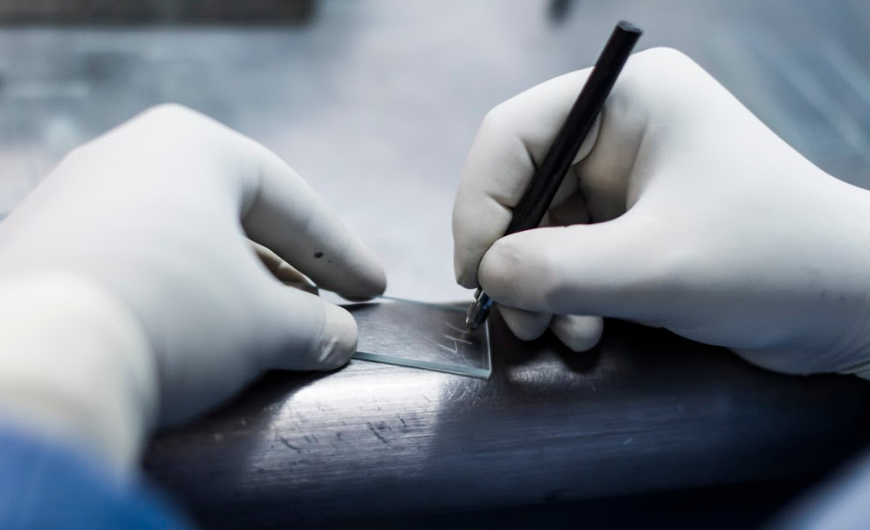
Figure 2: The laboratory serial number is written on one end of the slide using a diamond marker

Figure 3: Avoid Multiple Labelling; a grease pencil has been used to label the slide.
Labelling of slides needs to be monitored and supported by the concerned Senior TB Laboratory Supervisor (STLS) during External Quality Assessment (EQA) visits.
Resources
Kindly provide your valuable feedback on the page to the link provided HERE
Making the smear
ContentThe National TB Elimination Programme (NTEP) has a standard procedure for sputum smear preparation, the steps for which are listed below:
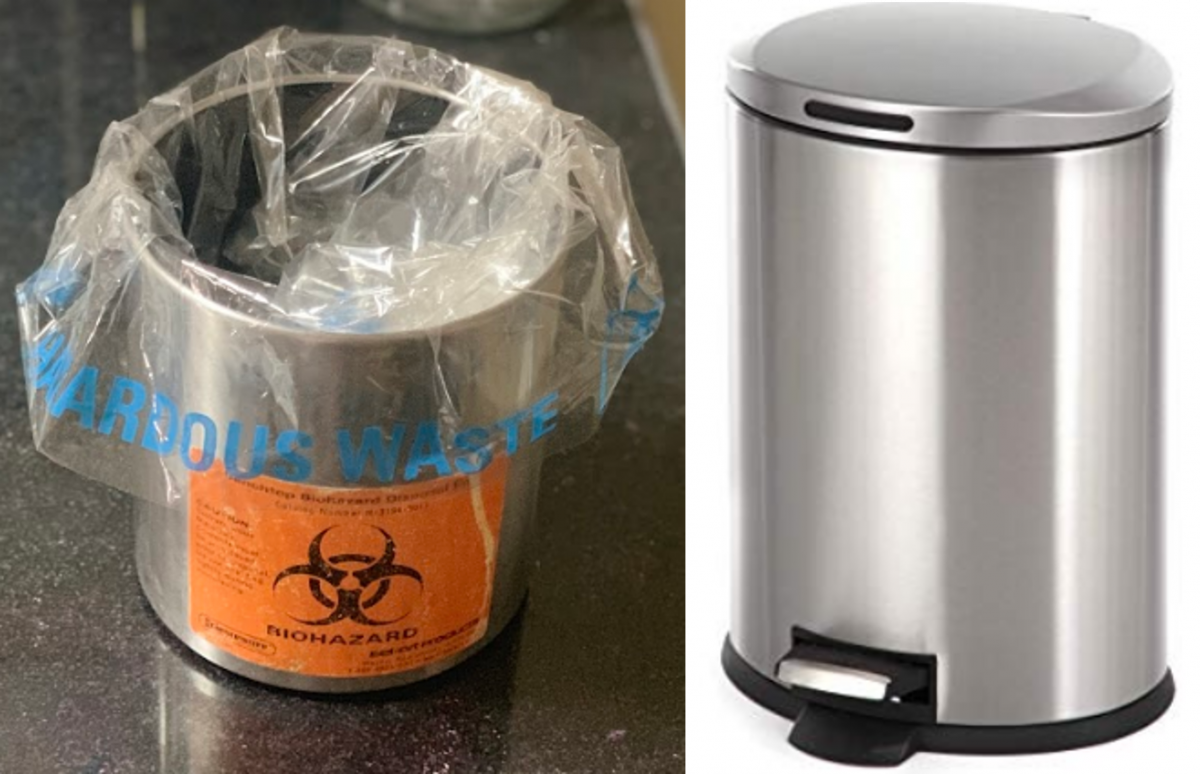
The tools required for smear preparation include a clean work surface, new and clean glass slides, a discard bucket or a foot-operated bin with a plastic liner, bamboo or wooden applicator sticks or sterile wire loop, spirit lamp and a rack for drying smears.
- Use new, clean, unscratched glass slides and label the slide with the laboratory serial number.
- Prepare the smear in the centre of the slide covering 3 cm X 2 cm
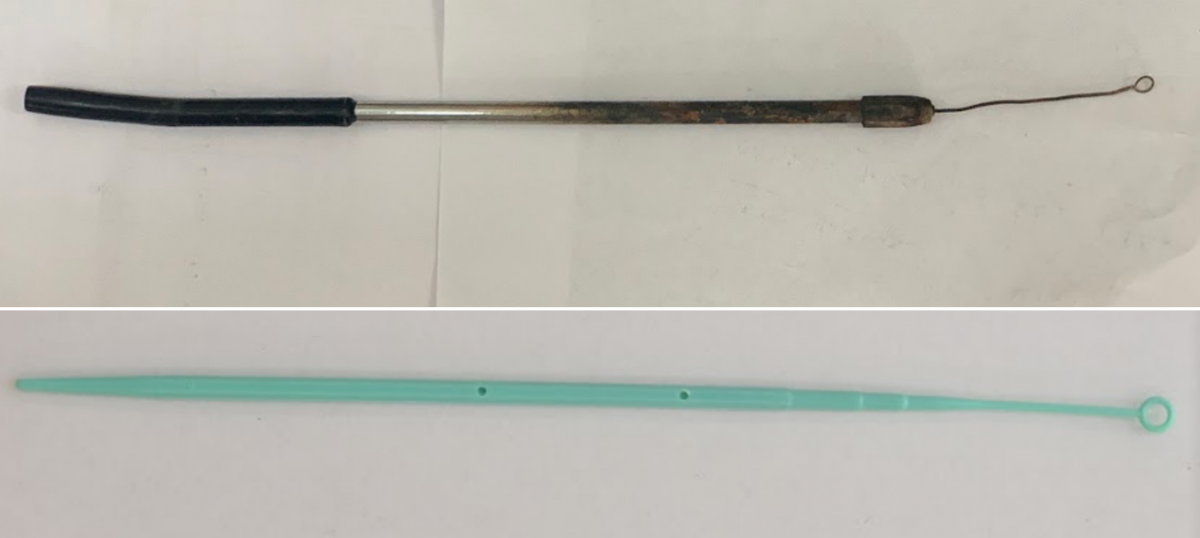
The smear is prepared by using either a wooden stick (Figure 2) or a sterile wire loop (Figure 3).
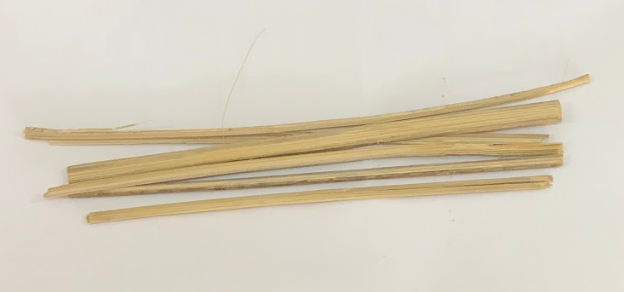
Figure 2: Wooden stick used in smear preparation
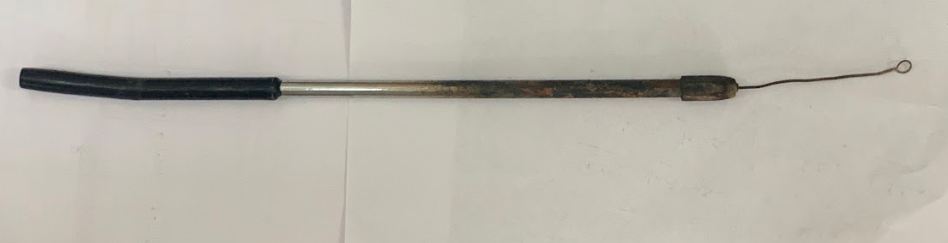
Figure 3: Sterile wire loop used in smear preparation
Steps for Smear Preparation Using a Wooden Stick
- Break the wooden stick into two halves with uneven ends.
- Using the uneven end, select and pick purulent portions of the sputum specimen and transfer onto a new, clean, labelled, glass slide.
- Using the wooden stick, spread the sputum evenly, in a continuous rotational movement, to cover two-thirds of the central portion of the slide. Smear preparation should be done near a flame. This is required as approximately 6 inches around the flame is considered as a sterile zone which coagulates the aerosols raised during smear preparation.
- Discard the used wooden sticks in the discard bucket or a foot-operated bin with a liner and disinfectant. A different broomstick is used for each smear so that one patient's sputum is not mixed with another patient's sputum.
- Air-dry the smear slide on the rack for 30 minutes
- After air-drying, heat-fix the smear, using a lighted spirit lamp.
Steps for Smear Preparation Using a Wire Loop
- Take a nichrome wire loop or a disposable loop.
- Using the loop, select and pick purulent portions of the sputum specimen and transfer onto a new, clean, labelled, glass slide.
- Using the loop, spread the sputum evenly, in a continuous rotational movement, to cover two-thirds of the central portion of the slide.
- After use, sterilize the loop in an electric loop sterilizer or flame the loop to red-hot.
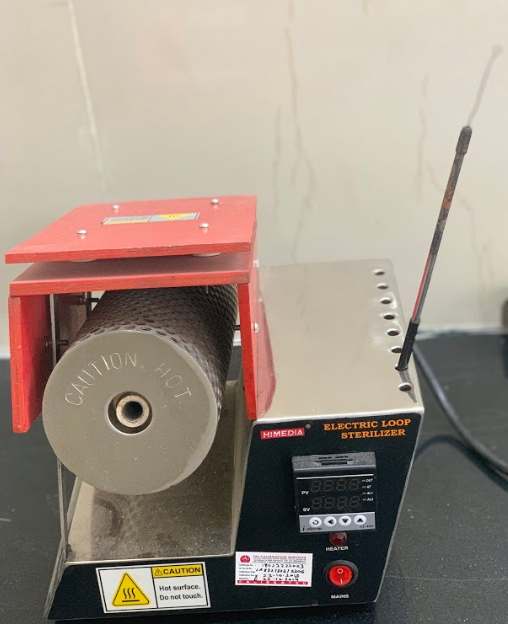

- Air-dry the smear slide on the rack for 30 minutes.
- After air-drying, heat-fix the smear using a lighted spirit lamp.
Resources
- Module for Laboratory Technicians (RNTCP), Central TB Division, MoHFW, 2005.
- Laboratory Diagnosis of Tuberculosis by Sputum Microscopy, GLI Initiative.
Kindly provide your valuable feedback on the page to the link provided HERE
Air drying and heat fixing
ContentFor sputum smear microscopy, the slides should be air-dried as heating the slide while the smear is wet can result in bubbling of TB bacilli into the air.
Fixation makes the sputum stick to glass slide and preserves the shape of the bacilli.
The procedure for air-drying and heat-fixing the slide is as follows:
- A smear prepared on a clean glass slide from mucopurulent portion of the specimen is air dried for 15-30 minutes on a rack (see Figure 1)

Figure 1: Rack for air-drying slides
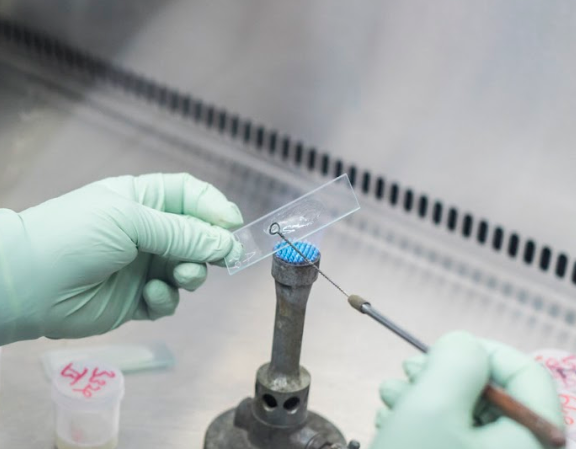
- When dry, the smear facing upwards is fixed by heat from below. This can be achieved by passing the slide 2-3 times over the flame of a spirit lamp (as shown in Figures 2 and 3) for 3-4 seconds each time.

Figure 2: Fixing the Smear by Heat Fixation; Source: Laboratory Diagnosis by Sputum Smear Microscopy

Figure 3: Spirit lamp used to heat-fix smears
Important points to consider when fixing smears
- Heat fixing does not always kill Mycobacteria, exercise care when handling slides.
- Flame fixing may aerosolize bacilli from the smear.
- Overheating can damage the bacilli, burn the smear or break the slide.
- Insufficient heat or time can lead to smear washing off during staining steps.
- Heating for too short a period can result in a false-negative result because the TB bacilli will not be well preserved on the slide.
After the smears are fixed, they can be stained for examination or stored, or used in proficiency testing panel and quality control slides for staining.
Resources
Laboratory diagnosis by sputum smear microscopy
Assessment
Question
Answer 1
Answer 2
Answer 3
Answer 4
Correct answer
Correct explanation
Page id
Part of Pre-test
Part of Post-test
Heat fixing does not always kill mycobacteria.
True
False
1
Heat fixing does not always kill mycobacteria.
Yes
Yes
Qualities of a good sputum smear
ContentGood quality smears are essential for accurate examination and results. A good quality sputum smear is one that is of uniform thickness and made from the mucopurulent portion of the sample in the center of the slide (Figure 1).
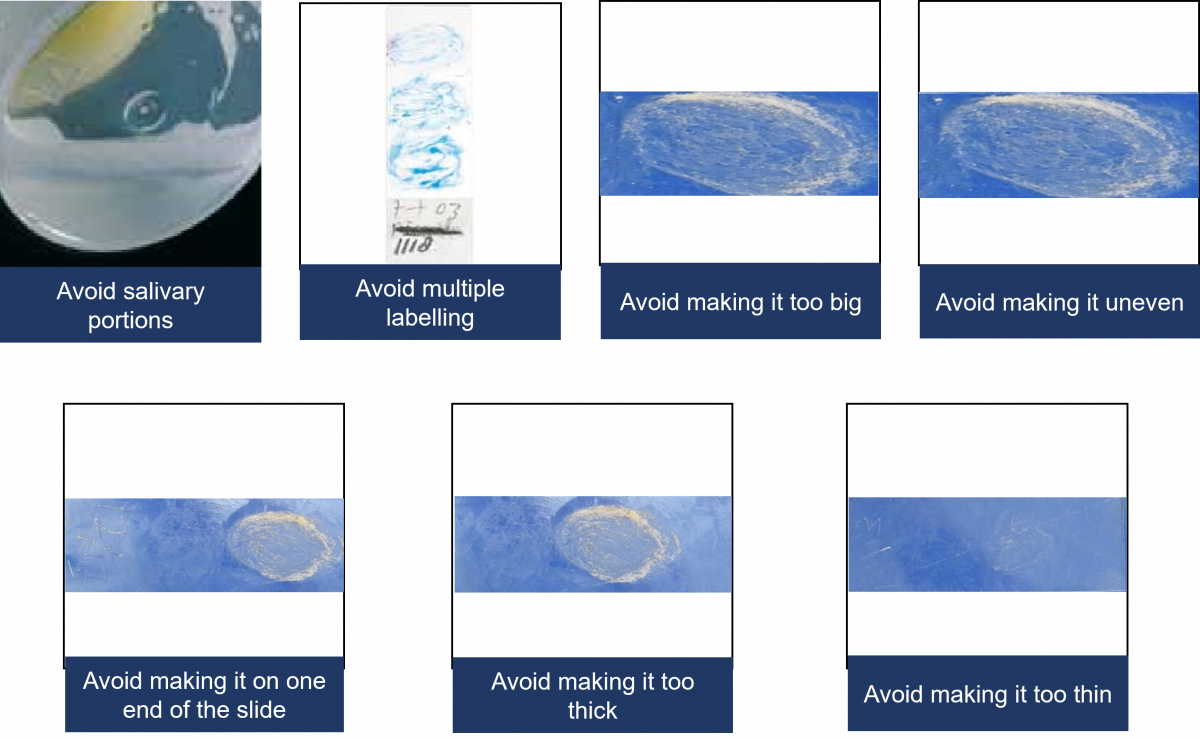
Do’s and Don’ts of a Good Quality Smear
- Do ensure that the smear size is 3 cm by 2 cm
- Do ensure there are no fingerprints on the prepared smear
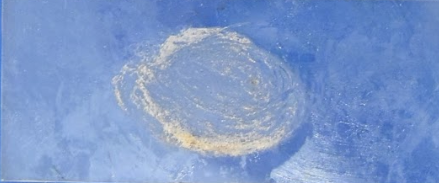
Figure 1: Uniform spread of smear, not too thick or thin, and covering an area of 3cm by 2cm
- The smear should not be very thick, but it should be thin enough to visualize a newsprint as can be seen in Figure 2
Figure 2: Smear thin enough to visualise a print through it
- All smears should be air-dried for 30 minutes, before heat fixing to ensure that the smear is not washed off during staining
Common Mistakes to Be Avoided
Resources
- The Handbook - Laboratory Diagnosis of Tuberculosis by Sputum Microscopy, 2013
- Module for Laboratory Technicians – RNTCP, 2005
- Manual for Sputum Smear Fluorescence Microscopy- RNTCP
Kindly provide your valuable feedback on the page to the link provided HERE
Fullscreen