-
STLS: Collection & Storage of Good Quality Specimen
FullscreenAccepting the request for testing
ContentThree things are received by the Lab Technician- Sample for testing, request form, and request for test in Nikshay.
Accepting the request for testing includes the following steps:
1. The LT verifies details on the request form that has eleven parts.
- The first part contains details on the name of referring facility, name of the patient, complete address, age & gender of the patient, date of referral, type of presumptive TB, the key population to which the patient belongs and site of disease.
- The second part contains details of referring facilities, Nikshay ID, and the names of State, district and TB units.
- The third portion is for the diagnosis and follow-up of TB.
- The fourth portion is for the diagnosis and follow-up of drug-resistant TB.
- The fifth portion is to indicate the required tests with the details of the person requesting the test.
- Parts six to eleven are used for reporting test results.
2. The LT verifies the quality of the sample received.
3. LT captures details on the patient, reasons for testing, test requested, and the visual appearance of the sample in the TB Laboratory register.
4. LT verifies the test request generated in Nikshay against the test ID requested (Figure).

Figure: Test Details Added in Nikshay by the Referring Health Facility; Source: Guidelines for PMDT in India, 2021.
5. LT initiates the test requested.
Resources
- Guidelines for PMDT in India, NTEP, 2021.
- Training Modules (1-4) for Programme Managers and Medical Officers, NTEP, 2020.
Assessment
Question
Answer 1
Answer 2
Answer 3
Answer 4
Correct answer
Correct explanation
Page id
Part of Pre-test
Part of Post-test
For all new presumptive TB cases, Nikshay ID is generated by the referring facility.
True
False
1
For all new presumptive TB cases, Nikshay ID is generated by the referring facility.
Yes
Yes
Spot and early morning sputum sample
ContentPresumptive pulmonary TB patients are subjected to sputum smear microscopy (Ziehl Neelsen (ZN)/ Florescence Microscopy (FM)). Two consecutive sputum specimens will identify the vast majority (95–98%) of smear-positive TB patients
Two specimens are collected:
- One Spot and one early morning sample OR
- Two supervised spot specimens collected at least one hour apart, and smears made from both the samples.
If one or both smears are positive, the patient is diagnosed as a microbiologically confirmed pulmonary TB case.
- The spot specimen collected is labelled as 'a'.
- While the patient is given a labelled container with instructions to cough out sputum into the container early in the morning after rinsing the mouth with water. This is the early morning specimen. This is labelled as specimen 'b'.
- If the health facility is not a Designated Microscopy Centre (DMC), then the patient is given a sputum container with the instructions to collect an early morning specimen and go with the sputum specimen to the DMC where the spot specimen can be collected.
- In case the patient is not able to travel to the DMC, then the spot specimen could be collected at the nearest health facility or sputum collection centre and transported to the DMC.
- These two samples should be collected within a day or two consecutive days.
- Two supervised spot samples may be collected one hour apart if patient is too sick, coming from a long distance or likelihood of not giving a second sample is significant.
- Collection of early morning specimens is preferred because of the overnight accumulation of secretions. However, spot samples collected at any time for patients is also suitable if productive sputum is expectorated after deep cough.
Resources
Assessment
Question
Answer 1
Answer 2
Answer 3
Answer 4
Correct answer
Correct explanation
Page id
Part of Pre-test
Part of Post-test
The spot specimen collected for sputum microscopy is labelled as 'a'.
True
False
1
The spot specimen collected for sputum microscopy is labelled as 'a'.
Yes
Yes
Educating patient on Sputum collection and dispensing Sputum cup
ContentEducating patients on collection is essential to have good quality sputum. The healthcare worker (HCW)/ medical officer (MO) or the laboratory technician (LT) can educate patients on how to collect and dispense sputum.
The HCW/MO/LT provides a new sputum cup with the Laboratory Serial Number written on its side to the patient. They should explain that sputum should be collected in an open place or in a well-ventilated room; it should not be collected in closed rooms, toilets and ill-ventilated rooms
A specimen collected under supervision is likely to yield better results. Supervising person has to demonstrate how to collect good sputum and dispensing it:
- Using a laboratory sputum cup, demonstrate how to open the lid of the specimen container and place it conveniently within their reach, so they can close it immediately after collecting sputum and also how to screw the cap on the cup tightly so it doesn't leak.
- Demonstrate how to bring up sputum, beginning with rinsing their mouth as food particles may give false positive results.
- Demonstrate deep inhalation (2–3 times) and let the patient know that this will initiate the cough reflex in most individuals.
- Demonstrate how individuals can place their palms on the waist, squat or sit and continue deep breathing again. Tapping or thumping of the back
may encourage expectoration (Sitting and placing hands on the waist fixes the shoulder and pelvic muscles and brings the intercostal muscles of ribcage and diaphragm into action) - After deep inhalation and coughing deeply, the sputum should come up in their mouth. The sputum is retained in the mouth and allowed to fall from their tongue into the pre-labeled container. Patient should be encouraged not to spit into the container. The patient can also be encouraged to cough directly into the cup.
- The patient’s mouth should not touch the container and the patient must ensure that sputum does not touch the outside of the container.
- The patient should not open the sputum cup till they are ready to use it
- They should not rub off the number written on the side of the container
- They should not touch the inside of the container with their fingers or tongue while collecting sputum
The person collecting the specimen should make sure that no one stands in front of the individual who is trying to cough up the sputum. When an individual has only coughed up saliva or has not coughed up at least 2 ml of sputum, they should be encouraged to give good specimen that is of appropriate quantity.
Resources
Assessment
Question
Answer 1
Answer 2
Answer 3
Answer 4
Correct answer
Correct explanation
Page id
Part of Pre-test
Part of Post-test
When collecting sputum into containers, which of the following should not be done?
Cough deeply and directly into the sputum cup.
Sputum can sometimes touch the outside of the container.
Always close the lid tightly, after putting the sputum into the cup.
None of the above
2
When dispensing sputum into the sputum container, sputum must never touch the outside of the container.
Yes
Yes
Steps to Ensure a Good Quality Sputum Sample
ContentThe Healthcare Worker (HCW) needs to carefully explain how to collect a good quality sputum specimen. He/she needs to demonstrate how to bring up sputum from the chest, what a good sputum specimen looks like, and the quantity of sputum required.
Characteristics of a Good Sputum Sample
- Thick (semi-solid) muco-purulent (yellowish) in consistency, coughed out deeply from the lungs
- Sufficient in amount i.e., 2 to 5 ml (or enough to cover the size of a fingernail at the bottom of the container)
- It should not be blood-stained (brownish colour) as far as possible.
Steps to Ensure Good Quality Sputum Sample
- Explain to the patient the characteristics of sputum - that it is thick and mucoid as compared to saliva which is thin and watery.
- The patient should preferably rinse his/her mouth to get rid of any food particles which may give false-positive results.
- One should demonstrate to the patient by action how s/he should take deep breaths and bring up the sputum.
- The patient is instructed to inhale deeply (2–3 times), which will initiate the cough reflex in most patients.
- The sputum is retained in the mouth and spit into the pre-labelled container without spilling.
- Some patients may not be able to expectorate with deep breathing, in which case HCW should demonstrate to them how they should place their palms on the waist, squat or sit and continue deep breathing again.
- Tapping or thumping of the back may encourage expectoration. (Sitting and placing hands on the waist fixes the shoulder and pelvic muscles and brings the intercostal muscles of the ribcage and diaphragm into action).
- When a patient has only coughed up saliva or has coughed up less than 2 ml (the size of a fingernail at the bottom of the container) of sputum, the patient should be encouraged to provide a better specimen.
Resources
Receiving a biological specimen at the Laboratory
ContentBiological specimen/ samples collected on reaching a TB testing laboratory needs to be formally received. The sample may be handed over by agents(couriers, health staff/ volunteers, patient representatives) or by patients themselves. The formal receipt of sample enables further processes such as testing and communication of results back to the patient. If the sample is successfully received, the appropriate testing process is initiated using the sample, else it is rejected and a fresh sample requested.
The designated Lab Technician (LT) at the Laboratory is responsible for receiving the sample. To initiate the receipt, the sample along with the patient, or the sample along with accompanying test request is required. If it is available, following are the steps to complete sample receipt:
- Compare patient information (Patient Name and Patient ID / Sample ID/ Test ID) to the test request that has been made.
- This is performed by searching the patient ID in Nikshay under the Diagnostics menu and comparing and matching the patient details and the label on the sample.
- If a physical form (Request for examination of Biological specimen for TB) is available, the details on the sample label and form needs to be compared and matched as well.
- If the details are matched the LT then checks the quality (mucopurulent, non-blood stained), quantity (adequate to perform the requested test) of the sample and ensures that there is no leakage.
- If the above checks are passed, then the LT Accepts sample. If not the LT rejects sample with a request to get a new sample. The rejection of the sample and request to obtain a new sample is recorded on Nikshay and is communicated to the patient and the person who requested the test.
- To register the receipt by accepting/Check in the sample for testing in Nikshay. The relevant information may also be captured in the TB Laboratory Register. Ensure that the Test ID (if not already present) / Lab serial number from the Lab register is labelled on the sample container.
Sample receiving in Nikshay

Figure: Sample Journey Tracking in Nikshay; Source: Nikshay Diagnostic Training Content.
Resources
- Training Modules (1-4) for Programme Managers and Medical Officers, NTEP, 2020.
- Nikshay Zendesk, Nikshay Knowledge Base, FAQs.
- Nikshay Zendesk, Nikshay Knowledge Base, Diagnostics.
Assessment
Question
Answer 1
Answer 2
Answer 3
Answer 4
Correct answer
Correct explanation
Page id
Part of Pre-test
Part of Post-test
The process of receiving a sample does not involve the following
Requesting a test
Matching test request information and container label.
Checking in a sample on Nikshay
Rejecting an inappropriate sample. 1 Request for testing and sample transportation to the laboratory has to happen before a sample can be received.
Matching request information and checking in a sample on Nikshay and rejecting inappropriate sample are steps in the receiving process.
Yes Yes - Compare patient information (Patient Name and Patient ID / Sample ID/ Test ID) to the test request that has been made.
Storing a sputum sample
ContentStorage conditions of sputum sample can effect the test results.
- Sputum samples should be transported to the laboratory as soon as possible after collection.
- It is the responsibility of Laboratory Technician (LT) and Senior TB Laboratory Supervisor (STLS) to ensure proper storage and transport of sputum specimens.
- Sputum is stored to preserve the specimen quality.
- The stored sputum samples should not be frozen.
Storage of Sputum Samples
For microscopy
- For smear microscopy, sputum specimens should be examined on the same day and not later than 2 days after collection.
- If delay is unavoidable, the sputum collected should be stored in a cool place/ refrigerated at 4°C to inhibit the growth of unwanted microorganisms.
- Stored sputum samples should be protected from light and heat to prevent liquefaction of the sample, else it makes the selection of mucopurulent part of the sample difficult.
- Samples received over holidays/weekends should be stored in a cool place/ refrigerated at 4°C.
For liquid culture
- Sputum should be stored in a cool place/ refrigerated at 4°C to inhibit the growth of unwanted microorganisms; not later than 3 days after collection.
For molecular tests - Nucleic Acid Amplification Test (NAAT) and Line Probe Assay (LPA)
- Sputum must be stored by refrigerating at 4°C to inhibit the growth of unwanted microorganisms and transported in cool chain to the nearest molecular laboratory. It should not be stored beyond one week at 4°C.
Resources
Technical and Operational Guidelines; Chapter 3: Case finding and diagnosis strategy
Assessment
Question
Answer 1
Answer 2
Answer 3
Answer 4
Correct answer
Correct explanation
Page id
Part of Pre-test
Part of Post-test
The sputum collected expecting a time delay for processing should be stored in cool place/ refrigerated at 4°C.
True
False
1
The sputum collected expecting a time delay for processing should be stored in cool place/ refrigerated at 4°C.
Yes
Yes
-
STLS: Sputum Smear Preparation
FullscreenSteps involved in Smear Microscopy
ContentSputum smears must be prepared promptly after samples are collected or received in the laboratory.
Steps in smear preparation are as follows:
- Cleaning and Labelling of slide (No 1)
- Making the smear (No 2-3)
- Drying and Heat fixing the smear (No 4-5)
- Staining and counterstaining the smear (No 6- 12)
- Examination of slide/Reading the Smear (No 13-14)
- Reporting and recording the observations (Digitally and TB Lab register)
- Storage of slides (as per Laboratory Numbers in closed box) (No 15)


Figure: Steps in Smear Preparation; 1- Labelling of the slide, 2- Using a broomstick to pick up purulent portion (A) while avoiding the salivary portion (B), 3- Spreading sample on a glass slide, 4- Air-drying the slides, 5- Heat-fixing the smeared slides,6- Staining with 1% Carbol fuchsin, 7- Heating of stained smear, 8- Decolorize with 25% Sulphuric acid, 9- Rinse off decolourizer, 10- Counter stain with 0.1% Methylene blue, 11-Rinse off counter stain, 12-Drying the prepared slide, 13-14 Examination of smears , reporting of observations, 15-Storage of slides; Source: Laboratory Diagnosis by Sputum Smear Microscopy.
Resources
- Laboratory Diagnosis by Sputum Smear Microscopy - The Handbook, GLI, 2013.
- Module for Laboratory Technicians, CTD, 2005.
Question Answer 1 Answer 2 Answer 3 Answer 4 Correct answer Correct explanation Page id Part of Pre-test Part of Post-test Sputum smears should be dried by heating. True False 2 Sputum smears should be air-dried. Yes Yes Clean, fresh, unscratched slides should be used for smear preparation.
True False 1 Prevents deposits on stained smear. Yes Yes Cleaning and Labelling Slide
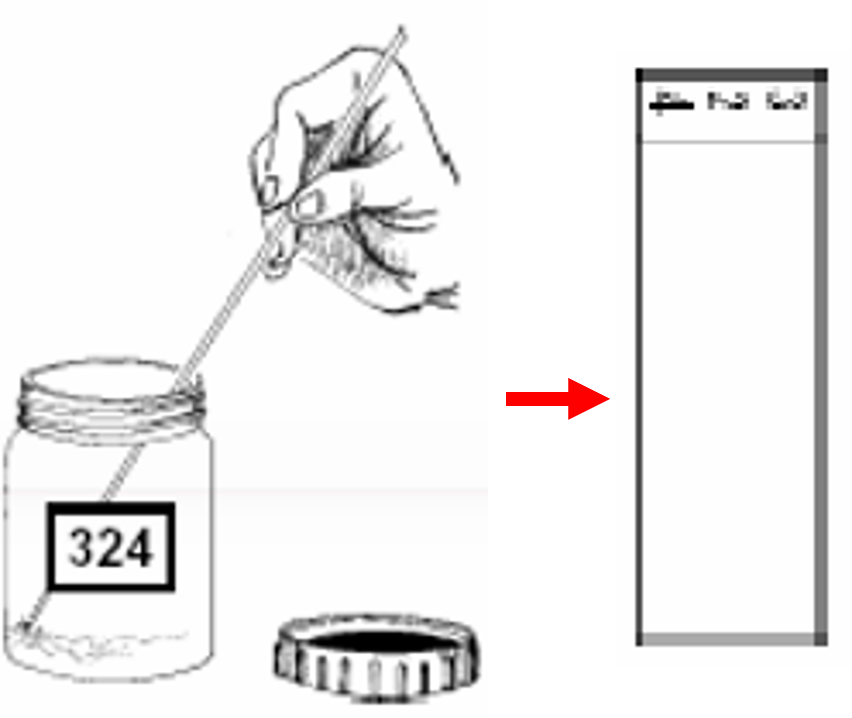
ContentA Laboratory Serial Number is assigned to each presumptive TB patient who is examined at the microscopy centre.
Each Laboratory Technician (LT) needs to ensure that all the slides are labelled using the Laboratory Serial Number. This is essential for recording as well as for the review of the slide during the supervisory visit as well as during the quality assurance exercise.
For every test, a new slide needs to be used. It is essential that there are no fingerprints or any scratches on the side of the slide (see figure 1).

Figure 1: Always select new, clean, grease-free and unscratched slides
Once the LT is ready to prepare a smear, he/she needs to write the Laboratory Serial Number on the left side of the slide with a diamond marker or a grease pencil only (see figure 2). Avoid multiple labelling (see figure 3).
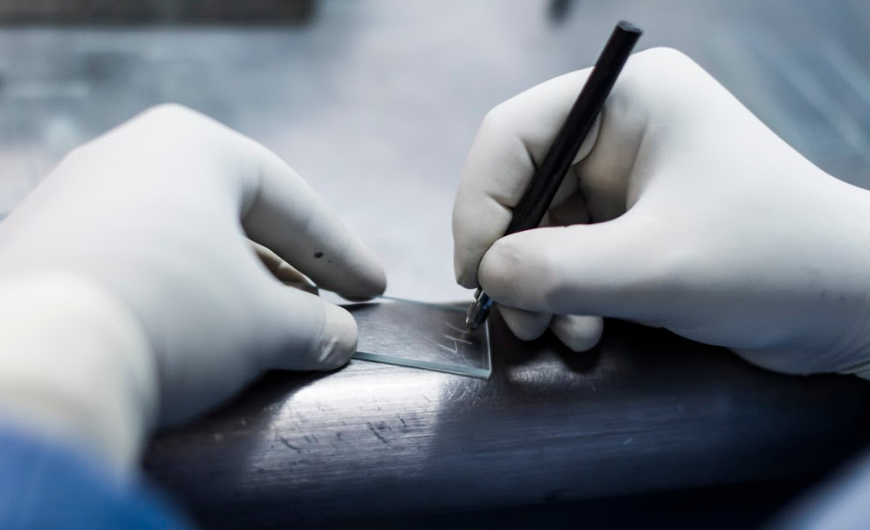
Figure 2: The laboratory serial number is written on one end of the slide using a diamond marker

Figure 3: Avoid Multiple Labelling; a grease pencil has been used to label the slide.
Labelling of slides needs to be monitored and supported by the concerned Senior TB Laboratory Supervisor (STLS) during External Quality Assessment (EQA) visits.
Resources
Kindly provide your valuable feedback on the page to the link provided HERE
Making the smear
ContentThe National TB Elimination Programme (NTEP) has a standard procedure for sputum smear preparation, the steps for which are listed below:
The tools required for smear preparation include a clean work surface, new and clean glass slides, a discard bucket or a foot-operated bin with a plastic liner, bamboo or wooden applicator sticks or sterile wire loop, spirit lamp and a rack for drying smears.
- Use new, clean, unscratched glass slides and label the slide with the laboratory serial number.
- Prepare the smear in the centre of the slide covering 3 cm X 2 cm
The smear is prepared by using either a wooden stick (Figure 2) or a sterile wire loop (Figure 3).
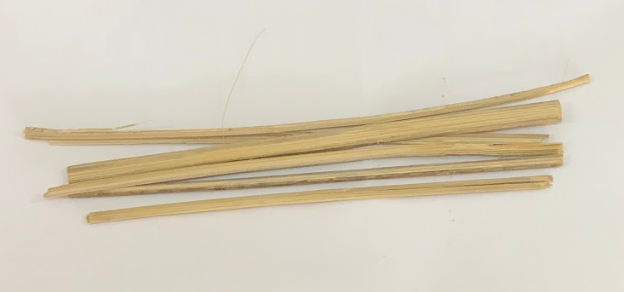
Figure 2: Wooden stick used in smear preparation
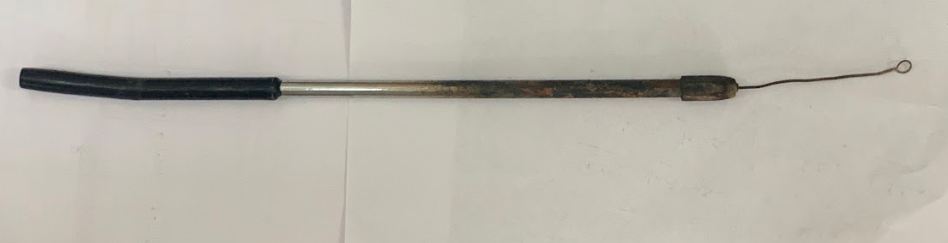
Figure 3: Sterile wire loop used in smear preparation
Steps for Smear Preparation Using a Wooden Stick
- Break the wooden stick into two halves with uneven ends.
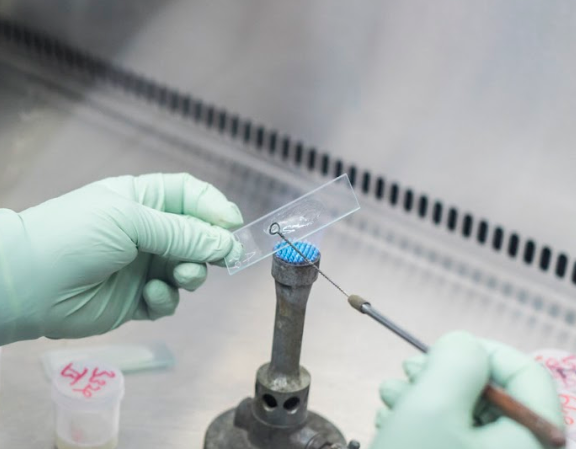
- Using the uneven end, select and pick purulent portions of the sputum specimen and transfer onto a new, clean, labelled, glass slide.
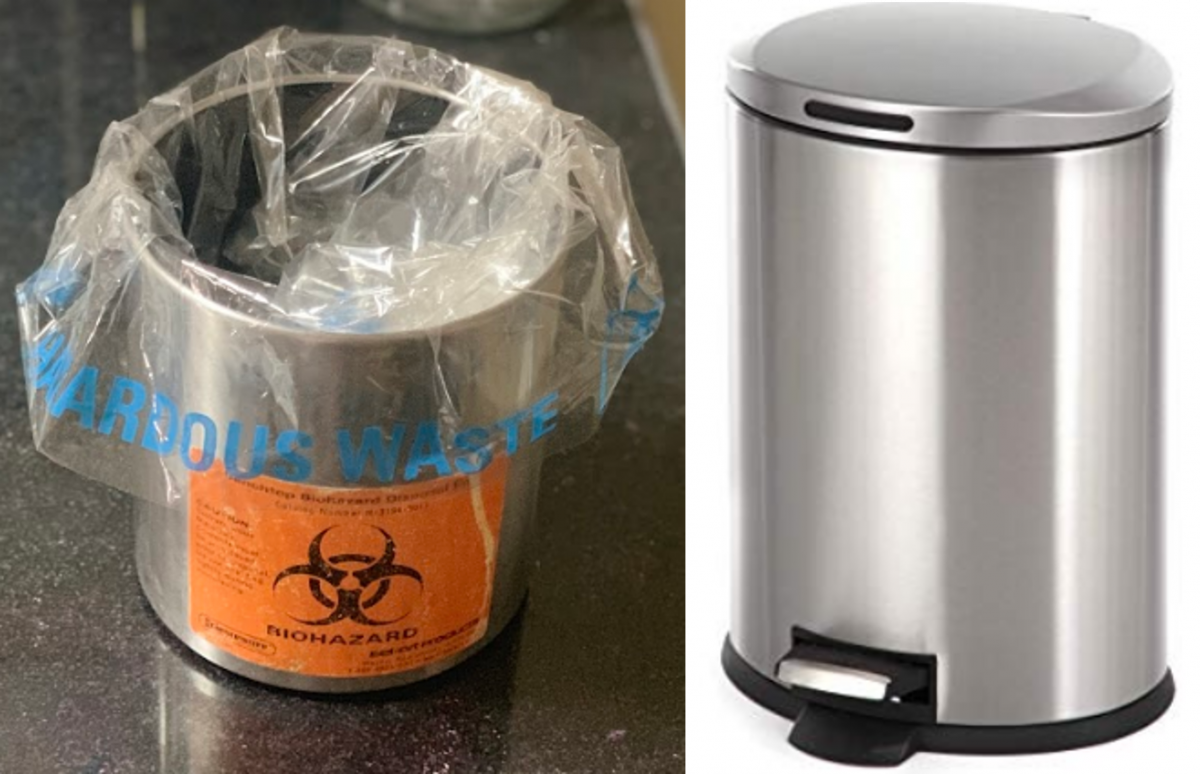
- Using the wooden stick, spread the sputum evenly, in a continuous rotational movement, to cover two-thirds of the central portion of the slide. Smear preparation should be done near a flame. This is required as approximately 6 inches around the flame is considered as a sterile zone which coagulates the aerosols raised during smear preparation.
- Discard the used wooden sticks in the discard bucket or a foot-operated bin with a liner and disinfectant. A different broomstick is used for each smear so that one patient's sputum is not mixed with another patient's sputum.
- Air-dry the smear slide on the rack for 30 minutes
- After air-drying, heat-fix the smear, using a lighted spirit lamp.
Steps for Smear Preparation Using a Wire Loop
- Take a nichrome wire loop or a disposable loop.
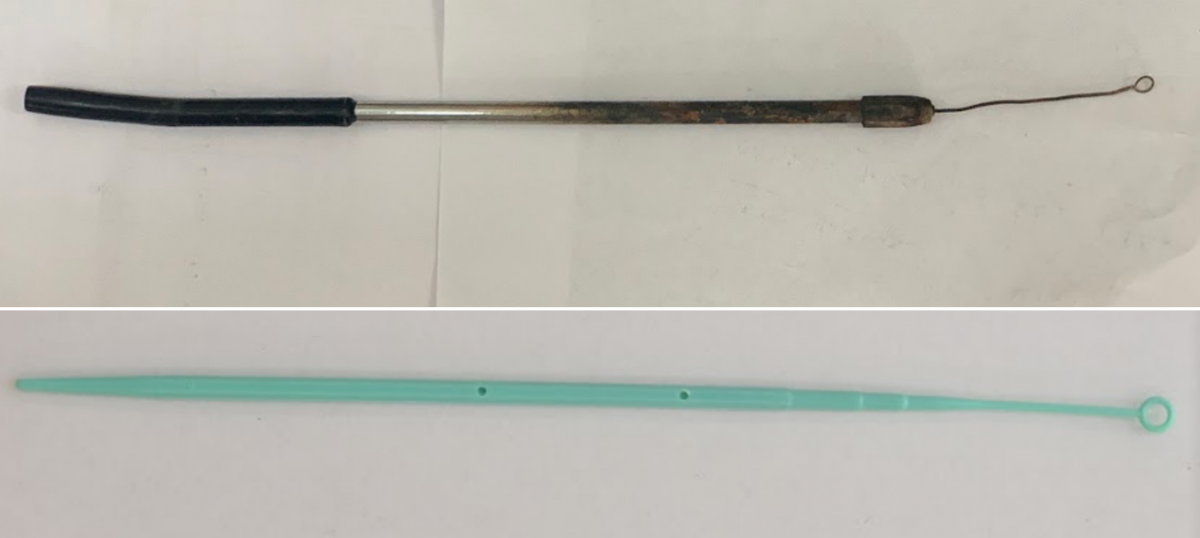
- Using the loop, select and pick purulent portions of the sputum specimen and transfer onto a new, clean, labelled, glass slide.
- Using the loop, spread the sputum evenly, in a continuous rotational movement, to cover two-thirds of the central portion of the slide.
- After use, sterilize the loop in an electric loop sterilizer or flame the loop to red-hot.
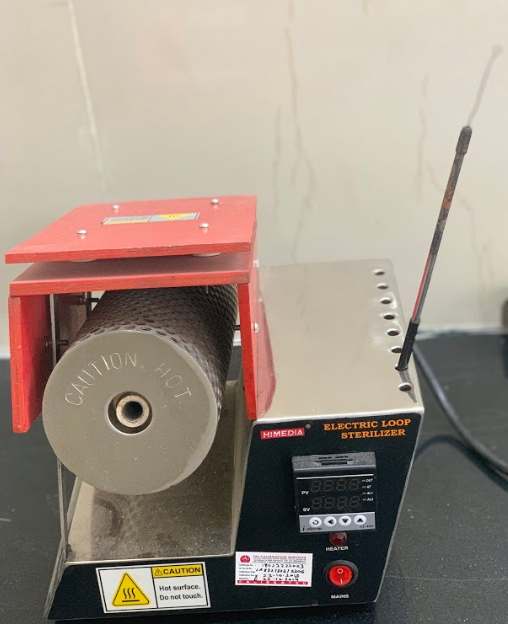

- Air-dry the smear slide on the rack for 30 minutes.
- After air-drying, heat-fix the smear using a lighted spirit lamp.
Resources
- Module for Laboratory Technicians (RNTCP), Central TB Division, MoHFW, 2005.
- Laboratory Diagnosis of Tuberculosis by Sputum Microscopy, GLI Initiative.
Kindly provide your valuable feedback on the page to the link provided HERE
Air drying and heat fixing
ContentFor sputum smear microscopy, the slides should be air-dried as heating the slide while the smear is wet can result in bubbling of TB bacilli into the air.
Fixation makes the sputum stick to glass slide and preserves the shape of the bacilli.
The procedure for air-drying and heat-fixing the slide is as follows:
- A smear prepared on a clean glass slide from mucopurulent portion of the specimen is air dried for 15-30 minutes on a rack (see Figure 1)

Figure 1: Rack for air-drying slides
- When dry, the smear facing upwards is fixed by heat from below. This can be achieved by passing the slide 2-3 times over the flame of a spirit lamp (as shown in Figures 2 and 3) for 3-4 seconds each time.

Figure 2: Fixing the Smear by Heat Fixation; Source: Laboratory Diagnosis by Sputum Smear Microscopy

Figure 3: Spirit lamp used to heat-fix smears
Important points to consider when fixing smears
- Heat fixing does not always kill Mycobacteria, exercise care when handling slides.
- Flame fixing may aerosolize bacilli from the smear.
- Overheating can damage the bacilli, burn the smear or break the slide.
- Insufficient heat or time can lead to smear washing off during staining steps.
- Heating for too short a period can result in a false-negative result because the TB bacilli will not be well preserved on the slide.
After the smears are fixed, they can be stained for examination or stored, or used in proficiency testing panel and quality control slides for staining.
Resources
Laboratory diagnosis by sputum smear microscopy
Assessment
Question
Answer 1
Answer 2
Answer 3
Answer 4
Correct answer
Correct explanation
Page id
Part of Pre-test
Part of Post-test
Heat fixing does not always kill mycobacteria.
True
False
1
Heat fixing does not always kill mycobacteria.
Yes
Yes
Qualities of a good sputum smear
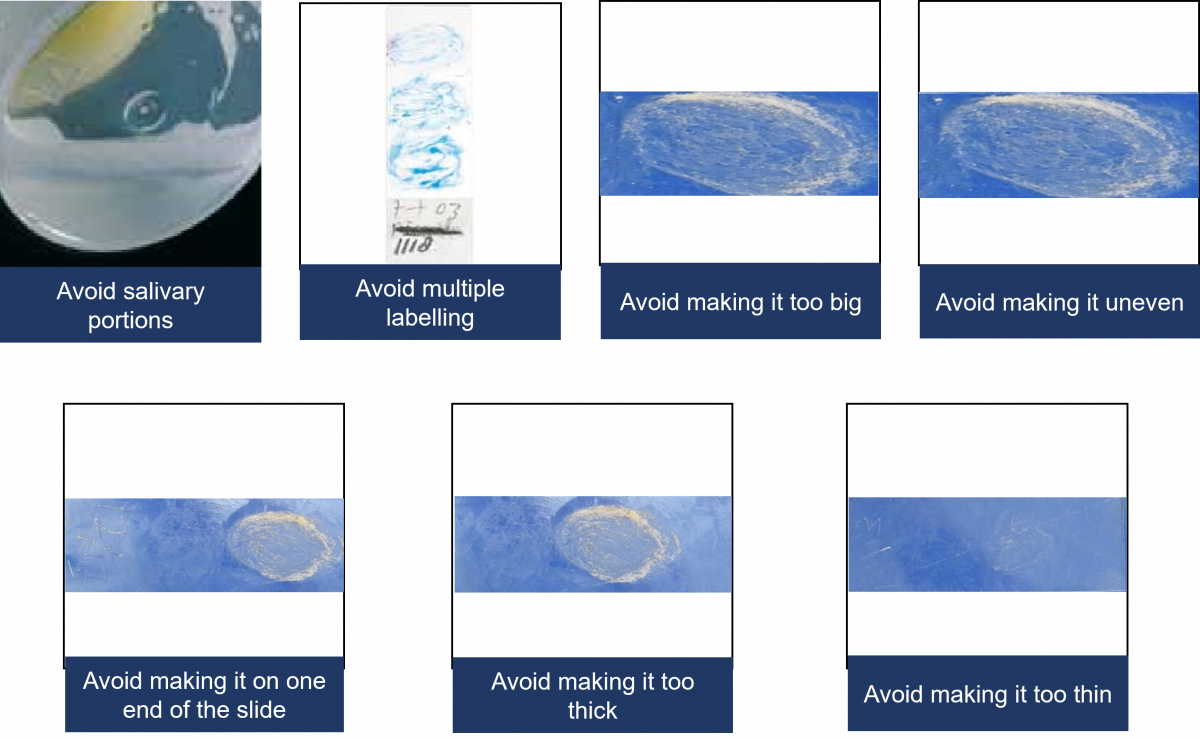
ContentGood quality smears are essential for accurate examination and results. A good quality sputum smear is one that is of uniform thickness and made from the mucopurulent portion of the sample in the center of the slide (Figure 1).
Do’s and Don’ts of a Good Quality Smear
- Do ensure that the smear size is 3 cm by 2 cm
- Do ensure there are no fingerprints on the prepared smear
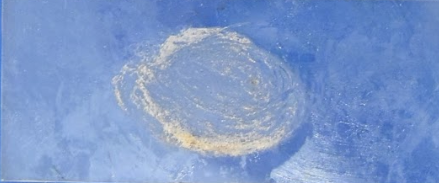
Figure 1: Uniform spread of smear, not too thick or thin, and covering an area of 3cm by 2cm
- The smear should not be very thick, but it should be thin enough to visualize a newsprint as can be seen in Figure 2
Figure 2: Smear thin enough to visualise a print through it
- All smears should be air-dried for 30 minutes, before heat fixing to ensure that the smear is not washed off during staining
Common Mistakes to Be Avoided
Resources
- The Handbook - Laboratory Diagnosis of Tuberculosis by Sputum Microscopy, 2013
- Module for Laboratory Technicians – RNTCP, 2005
- Manual for Sputum Smear Fluorescence Microscopy- RNTCP
Kindly provide your valuable feedback on the page to the link provided HERE
-
STLS: Preparation of Staining solutions
FullscreenPreparation of Reagents for ZN Microscopy
ContentThe National TB Elimination Program (NTEP) recommends freshly preparing reagents from commercial procured products, at the District TB units to be used for microscopy. Chemicals need to be carefully monitored for potency and the calculation needs to be accurate while preparing reagents for smear microscopy.
For Preparing 1% Carbol Fuchsin (500ml): The required chemicals and materials for preparing 500 ml Carbol Fuchsin are:
1. Basic Fuchsin
- Chemical name: Pararosaniline hydrochloride
- Chemical structure: C19H18N3Cl
- Molecular Wt: 323.8
- Colour: Metallic green
Potency correction factor: Note down the dye content – this should be available on the container. The dye content should be approximately 85% - 88%. To calculate the required amount of basic fuchsin, divide the actual amount required by the dye content. For example: dye content = 85%, actual amount required = 5gms, required amount of dye = 5/0.85 = 5.88 gms.
2. Ethyl Alcohol: 50 ml (Absolute alcohol, purity must be 98-100%)
3. Carbolic acid crystals (Phenol): 25 gms
- Chemical name: Phenol
- Chemical structure: C6H5OH
- Molecular Wt: 94.11
- Melting point: 40°C+2.5
4. Distilled purified water: 500 ml
Steps for Preparing 1% Carbol Fuchsin (500ml)
- Add 25 gms of phenolic crystals to a conical flask
- Add 50ml ethanol
- Mix well until the crystals completely dissolves. Add 50 ml distilled water if required.
- Conical flask should be kept in water bath set at 60°C or in a trough containing warm water
- Weigh required amount of basic fuchsin powder and transfer it into a conical flask
- Mix well until the crystals dissolve well.
- Make the total volume to 500ml by adding distilled water
- Filter using Whattman filter paper and transfer into a bottle
- Label as 1% Carbol Fuchsin - Primary stain
- Date of preparation, date of expiry, batch no. and the name of the technician or STLS who has prepared the stain should be clearly mentioned on the bottle.
- Store it in cool place, away from direct sunlight
- Any time particles start to form in the Carbol Fuchsin solution, the solution must be filtered again
For Preparing 25% Sulphuric Acid (500ml):
- Chemical structure: H2SO4
- Molecular wt: 98.08
- Purity: 95-97%
- Colour: Clear
- Measure 375ml distil water into a 1L flask
- In a glass cylinder, measure 125ml concentrated Sulphuric Acid. Pour it slowly and gently into the conical flask containing distilled water. Note: Always add acid to water. Never add water to acid
- To dissipate the heat generated, place the flask in a trough of water
- Mix well
- Allow to cool
- Transfer into a bottle
- Label as 25% Sulphuric Acid - Decolorizing Solution
- Date of preparation, date of expiry, batch no. and the name of the technician or STLS who has prepared the solution should be clearly mentioned on the bottle.
For preparing 0.1% Methylene Blue (500ml):
- Chemical name: Methylthionine chloride
- Chemical structure: C16H18ClN3S
- Molecular Wt: 319.9
Potency correction factor: Note down the dye content – this should be available on the container. The dye content should be approximately 82%. To calculate the required amount of methylene blue, divide the actual amount by the dye content. For example: dye content = 82%, actual amount required = 0.5gms, required amount of dye = 0.5/0.82 = 0.61 gms.
- Weigh the required amount of Methylene Blue
- Dissolve it in 500ml distilled water
- Transfer into a bottle
- Label as 0.1% Methylene Blue
- Date of preparation, date of expiry, batch no. and the name of the person who prepared the solution should be clearly written on the bottle.
Table: Preparation of different volumes of stains for ZN microscopy
Ziehl-Neelsen method
Quantity of reagent for 5L
Quantity of reagent for 1L
Quantity of reagent for 500 ml
Quantity of regent for 100 ml
Basic fuchsin (dye content/purity if 85%)
58.8 g
11.76 g
5.88 g
1.17 g
Alcohol
500 ml
100 ml
50 ml
10 ml
Phenol crystals
250 g
50 g
25 g
5 g
Distilled water
To make final volume 5000 ml
To make final volume 1000 ml
To make final volume 500 ml
To make final volume 100 ml
Carbol-fuchsin 1%
Sulfuric acid
1250 ml
250 ml
125 ml
25 ml
Distilled water
3750 ml
750 ml
375 ml
75 ml
H2SO4 25%
Methylene blue (dye content if 82%)
6.1 g
1.22 g
0.61 g
0.12 g
Distilled water
5000 ml
1000 ml
500 ml
100 ml
Methylene blue 0.1%
Always perform a quality check of the reagents prepared by using Quality Control Positive and Quality Control Negative. If purity is not available on the reagent bottle, then search the website of the company of which the reagent was procured or ask the company about the certificate mentioning about the purity of reagent
Please watch the video below for more information:
Video fileResources
- Module for Laboratory Technicians (RNTCP), Central TB Division, MoHFW, 2005
- TB Lab Consumables Specifications 2019
- SoP for preparation of Laboratory Reagents - WHO
- Laboratory Diagnosis of Tuberculosis by Sputum Microscopy, GLI Initiative
Kindly provide your valuable feedback on the page to the link provided HERE
Preparation of Reagents for FM Microscopy
ContentReagent preparation is an important activity and it’s essential to use certified chemicals and reagents. One should always check the potency of the chemicals used and calculate the amount to be weighed accordingly.
The following are the steps for reagent (primary stain and counter stain) preparation for Florescence Microscopy:
0.1% Auramine–O (1 L), the primary stain
- Weigh 1 gm Auramine–O and transfer to conical flask.
- Add 30 gm Phenolic crystals (99.5% purity) and mix well.
- Add 100 ml absolute Ethanol (98-100% purity) and mix well.
- Add 870 ml distilled water to make up final volume of 1 L.
- Filter and transfer to amber bottle.
- Label the bottle as 0.1% Auramine–O.
- Date of preparation, date of expiry, batch no. and name of the Senior TB Lab Supervisor (STLS) who has prepared the stain should be clearly mentioned on the bottle.
1% Acid Alcohol (1 L) to decolorize
- Dissolve 5 gm Sodium chloride in 250 ml distilled water.
- Add 5 ml concentrated hydrochloric acid.
- Mix with 750 ml absolute alcohol.
- Always add acid slowly to alcohol, not vice-versa.
- Store in amber coloured bottle.
- Label the bottle as 1% Acid Alcohol.
- Date of preparation, date of expiry, batch no. and name of the STLS who has prepared the stain should be clearly mentioned on the bottle.
0.5% Potassium Permanganate, KMnO₄ (1 L), the counter stain
- Weigh 5 gm of Potassium permanganate (99.5% purity).
- Transfer to a conical flask.
- Take 1 L of distilled water.
- Add small amounts of distilled water tothe conical flask containing KMnO₄ and mix well.
- Add the remaining distilled water to make up final volume of 1 L.
- Filter and transfer to a bottle.
- Label the bottle as 0.5% Potassium permanganate.
- Date of preparation, date of expiry, batch no. and name of the STLS who has prepared the stain should be clearly mentioned on the bottle.
Table: Preparation of Different Volumes of Stains for FM Microscopy
AURAMINE METHOD
QUANTITY OF REAGENT FOR 5 L
QUANTITY OF REAGENT FOR 1 L
QUANTITY OF REAGENT FOR 500 ML
QUANTITY OF REAGENT FOR 100 ML
Auramine
Ethanol
Phenol
Distilled water
0.1% Auramine
5.0 g
500 ml
150.0 g
To make final volume 5000 ml
1.0 g
100 ml
30.0 g
To make final volume 1000 ml
0.5 g
50 ml
15.0 g
To make final volume 500 ml
0.1 g
10 ml
3.0 g
To make final volume 100 ml
Hydrochloric acid
Sodium chloride
Ethanol
Distilled water
1% Acid–alcohol
25 ml
25.0 g
3750 ml
1250 ml
5 ml
5.0 g
750 ml
250 ml
2.5 ml
2.5 g
375 ml
125 ml
0.5 ml
0.5 g
75 ml
25 ml
Potassium permanganate
Distilled water
0.1% Potassium permanganate
25.0 g
5000 ml
5.0 g
1000 ml
2.5 g
500 ml
0.5 g
100 ml
Video fileResources
Kindly provide your valuable feedback on the page to the link provided HERE
-
STLS: Staining Sputum Smear
FullscreenZN Microscopy: Staining Process
ContentAfter air drying and heat-fixing of the smear, it needs to be stained for the identification of MTB during microscopy.
The reagents required for the ZN staining procedure are shown in Figure 1. The steps involved in the staining procedure are shown in Figure 2.

Figure 1: Reagents Required for ZN Staining

Figure 2: Steps involved in ZN staining procedure
For a visual representation of the above-mentioned steps, please click the video below.
Video fileResources
Laboratory Diagnosis by Sputum Smear Microscopy, GLI Initiative
Assessment
Question Answer 1 Answer 2 Answer 3 Answer 4 Correct answer Correct explanation Page id Part of Pre-test Part of Post-test When staining ZN slides, it is important to heat the slides until it begins to boil. True False 2 When staining ZN slides, it is important to heat the slides gently until you see vapours, but do not boil. Yes Yes ZN Microscopy: Properties of a well stained slide
ContentCharacteristics of a Well-stained Slide
- Staining and appearance of Mycobacterium species in ZN staining.
- The primary dye - carbol-fuschin stains all cells pink in sputum samples.
- The bacilli retain the primary pink carbol-fuschin on decolourisation with acid-alcohol.
- Epithelial, pus and mucous cells in the sputum decolourise on the addition of the acid-alcohol and take up the counterstain dye of methylene blue.
- Thus, Mycobacterium species appears pink against a background of epithelial, pus and mucous cells that appear blue.
- ZN-stained Mycobacterium species are visible as pink, long, slender rods with granules or V-shaped or in clumps.
- Mycobacterium species should not be stained too dark or pale pink.
- Possible reasons:
- Smear thickness is not appropriate
- Insufficient decolourisation
- Low acid concentration
- Carbol-fuchsin dries on smear
- Primary staining/ decolourisation time not appropriate
- Expired reagents used
- Possible solutions:
- Internal quality control of prepared smears and stains
- Use a stopwatch to time staining steps.
- Do not overheat carol-fuchsin.
- Possible reasons:
- The counter-stained cells should not be dark blue.
- Possible reasons:
- Smear thickness is not appropriate
- Excessive counterstaining time
- Inadequate washing after counterstaining
- Methylene blue concentration is not appropriate
- Possible solutions:
- Internal quality control of prepared smears and stains
- Use a stopwatch to time staining steps
- Possible reasons:
- There should not be any deposits on stained smears.
- Possible reasons:
- Stains not filtered
- Slides not clean
- Possible solutions:
- Internal quality control of prepared stains
- Filter stains
- Use clean, fresh, unscratched slides for smear preparation.
- Possible reasons:
Resources
- Laboratory Diagnosis of Tuberculosis by Sputum Smear Microscopy - The Handbook, GLI, 2013.
- Module for Laboratory Technicians, RNTCP, CTD, 2005.
Assessment
Question Answer 1 Answer 2 Answer 3 Answer 4 Correct answer Correct explanation Page id Part of Pre-test Part of Post-test Which of these is/are the characteristic/s of a well-stained slide? Mycobacterium species should not be stained too dark or pale pink. Mycobacterium species are visible as pink long slender rods with granules or V-shaped or in clumps. The counter-stained cells should not be dark blue. All the above 4 ZN-stained Mycobacterium species are visible as pink, long, slender rods with granules or V-shaped or in clumps. The bacilli should not be stained too dark or pale pink. The counter-stained cells should not be dark blue. Yes Yes - Staining and appearance of Mycobacterium species in ZN staining.
Fluorescent Microscopy: Staining Process
ContentAfter air drying and heat-fixing of the smear, it needs to be stained.
Fluorescence microscopy (FM) staining should always be carried out in a designated area. The reagents required for the FM staining procedure are shown in Figure 1. The steps involved in the staining procedure are shown in Figure 2.

Figure 1: Reagents Required for FM Staining


Figure 2: Steps involved in FM staining procedure
For a visual representation of the above-mentioned steps, please click the video below:
Video fileResources
Laboratory Diagnosis by Sputum Smear Microscopy, GLI Initiative
Assessment
Question
Answer 1
Answer 2
Answer 3
Answer 4
Correct answer
Correct explanation
Page id
Part of Pre-test
Part of Post-test
What is the counterstain used in FM staining?
Acid Alcohol
Potassium Permanganate
Phenol
Auramine-O
2
In FM staining, Potassium Permanganate is used as the counterstain.
Yes
Yes
Fluorescent Microscopy: Properties of a well stained slide
ContentLight-emitting Diode Fluorescence Microscopy (LED-FM) utilises the fluorescent dye Auramine-O to stain and detect Mycobacterium species in clinical samples.
Characteristics of a Well-stained Slide
- Auramine-O stained Mycobacterium species are visible as bright yellow/ green long slender rods, slightly curved, with variable lengths, single or in clumps, with uniform staining or granular appearance against a dark background (Figure A).
-
Slides stained with Auramine-O should not have too much background fluorescence (Figure B)
Possible reasons:
- Smear thickness is not appropriate
- Insufficient decolourisation
- Counterstain too weak
- Auramine-O dries on the smear
-
Auramine-O not filtered
Possible solutions:
- Internal quality control of prepared smears and stains
- Use a stopwatch to time-staining steps
- Filter Auramine-O before use
- Add a sufficient quantity of stains to cover the smear
-
Slides stained with Auramine-O should not have pale fluorescence (Figure C)
Possible reasons:
- Smear thickness is not appropriate
- Low Auramine-O concentration
- Excessive decolourisation time
-
Stained smears exposed to daylight
Possible solutions:
- Internal quality control of prepared smears and stains
- Use a stopwatch to time-staining steps
- Store Auramine-O and stained slides in the dark
- Read stained slides as early as possible
- Non-fluorescent yellow/ green coloured bacillary shapes should not be considered as Mycobacterium species.
-
Slides stained with Auramine-O may contain stained artefacts/ background debris which are not Mycobacterium species.

Figure: Slides stained with Auramine-O showing bright yellow/ green slender rods (A); slide with too much background fluorescence (B); slide with pale fluorescence (C); Source: Laboratory Diagnosis by Sputum Smear Microscopy
Resources
- Laboratory Diagnosis of Tuberculosis by Sputum Smear Microscopy - The Handbook, GLI, 2013.
- Manual for Sputum Smear Fluorescence Microscopy, RNTCP, CTD.
Assessment
Question Answer 1 Answer 2 Answer 3 Answer 4 Correct answer Correct explanation Page id Part of Pre-test Part of Post-test Which of these is/are the characteristic/s of a well-stained FM slide? Mycobacterium species are visible as bright yellow/ green long slender rods against a dark background. Mycobacterium species are visible as pink, long slender rods.
Mycobacterium species are visible as pale yellow/ green long slender rods against a dark background. Mycobacterium species are visible as non-fluorescent yellow/ green coloured bacillary shapes. 1 Mycobacterium species are visible as bright yellow/ green long slender rods against a dark background. Yes Yes
-
STLS: Reading Smear and Reporting Microscopy results
FullscreenProcess of Reading a Smear
ContentThe manner and quality of smear reading has a major impact on the result of sputum smear microscopy and case detection. Each slide needs to be examined for at least 5 full minutes or 100 fields need to be examined.
The overall process of reading a smear is outlined in the figure below:

Figure: Process of reading a smear
Resources:
- AFB Smear Microscopy, Trainer Notes.
- Module for Laboratory Technicians.
- Laboratory Diagnosis of Tuberculosis by Sputum Microscopy.
Assessment
Question
Answer 1
Answer 2
Answer 3
Answer 4
Correct answer
Correct explanation
Page id
Part of Pre-test
Part of Post-test
What is the minimum time to be spent by an LT when examining a smear under the microscope?
30 minutes
5 minutes
2 minutes
30 seconds
2
Even the most experienced microscopist needs to examine each slide for at least 5 full minutes.
Oil immersion and focusing
ContentThe following are the measures to be kept in mind when adding immersion oil to the slide:
- Before adding immersion oil to the slide, ensure that the smear is facing upwards (Figure 1).
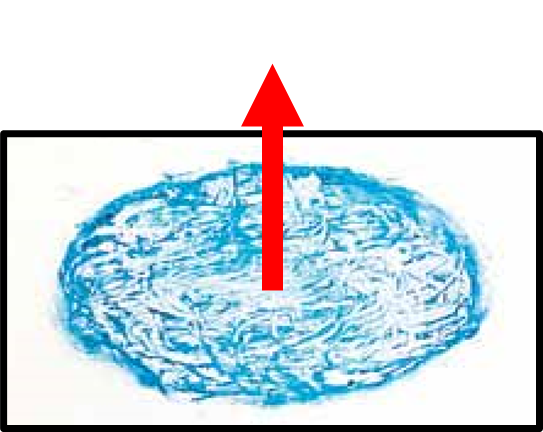
Figure 1: Slide should Face Upwards when Mounted on the Microscope Stage
- Add a drop of immersion oil, using the applicator (dropper bottle).
- The drop must fall freely onto the smear, so that the oil applicator does not touch the slide and get contaminated (Figure 2).
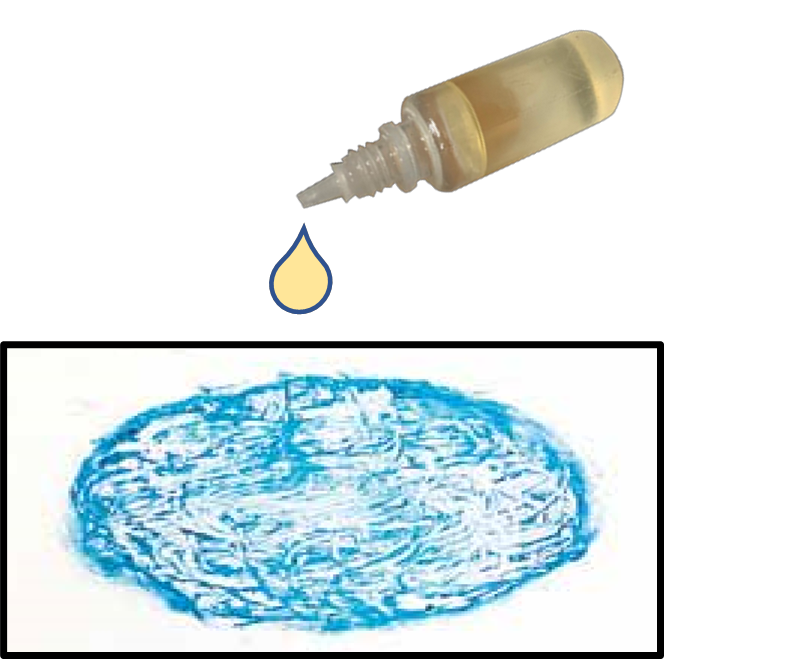
Figure 2: Oil Dropped onto Slide with an Applicator
- Mount the slide on the microscope and use the 10X objective lens to focus the smear, scan and look for mucoid material.
- Carefully rotate the 100X objective lens over the slide, adjust, sharp focus and observe under immersion oil.
Do’s and Don’ts:
- The 100X objective is the only lens requiring immersion oil.
- Keep the immersion oil away from other lenses.
- Use a good quality immersion oil.
- The immersion oil must have a medium viscosity and a refractive index (RI) greater than 1.5.
- Never allow the oil applicator to touch the slide.
- Do not use cedar wood oil diluted with xylene as it leaves a sticky residue on the lens and destroys the lens over time.
Resources
- Guidelines for Laboratory Consumables, Central TB Division, 2019.
- Laboratory Diagnosis of Tuberculosis by Sputum Microscopy, GLI Initiative.
Kindly provide your valuable feedback on the page to the link provided HERE
Reading a ZN stained smear
ContentImage
Resources
- AFB Microscopy Trainer Notes
- Module for Laboratory Technicians
- Laboratory diagnosis by sputum smear microscopy
Kindly provide your valuable feedback on the page to the link provided HERE
Reading a Fluorescent Stained slide
ContentSmears stained with the fluorescent dye, Auramine, are read with a Light Emitting Diode Fluorescence Microscope (LED-FM).
- The fluorescent-stained smears are to be read within 24 hours of staining in a dark room as the fluorescent stain fades on exposure to light.
- The slides are to be stored in the slide box to avoid exposure to light. Alternatively, they may be stored wrapped in brown or black paper and kept away from light.
- The slides should not be stored in a fridge as 4°C does not prevent or delay fading of fluorescent dye.
After fluorescent staining, smears are examined at much lower magnifications (typically 200x) than used for Ziehl Neelsen (ZN)-stained smears (1000x). Each field examined under fluorescence microscopy, therefore, has a larger area than that seen with bright field microscopy.
Examination Procedure
The steps include:
1. Switch on the LED-FM in a dark room.
2. Focus the stained slide using a 20x or 40x objective lens and view through the 10x eyepiece (magnification of 200x or 400x).
- Does not require the use of oil immersion.
3. Read smear in a linear pattern.
4. Count bacilli that appear as slender bright yellow fluorescent rods against a dark background in 30-50 fields. Rule out any artefact.
- For a trained and experienced Lab Technician (LT), each smear would take approximately 2 minutes for 30-50 fields or three horizontal sweeps.
Reporting Procedure
The smears are reported as negative/ scanty/ 1+/ 2+/ 3+ per the grading scale (Table).
Table: A Comparison between ZN (1000x) and FM (400x and 200x) for Grading of Smears at Different Magnifications
Result
1000 x magnification
1 length=100 HPF
400x magnification
1 length= 40 fields= 200 HPF
200x magnification
1 length=30 fields=300 HPF
Negative
Zero AFB/1 length
Zero AFB/1 length
Zero AFB/1 length
Scanty
1-9 AFB/1 length or 100 HPF
1-19 AFB/1 length
1-29 AFB/1 length
1+
10-99 AFB/1 length or 100 HPF
20-199 AFB/1 length
30-299 AFB/1 length
2+
1-10 AFB/1 HPF on average
5-50 AFB/1 HPF on average
10-100 AFB/1 field on average
3+
>10 AFB/1 HPF on average
>50 AFB/1 HPF on average
>100 AFB/1 field on average
Abbr: AFB: Acid Fast Bacilli; HPF: High Power Field
Resources
- Training Module (1-4) for Programme Managers and Medical Officers, NTEP, MoHFW, 2020.
- Manual for Sputum Smear Fluorescence Microscopy, RNTCP, MoHFW, 2007.
- Fading of Auramine-stained Mycobacterial Smears and Implications for External Quality Assurance.
Assessment
Question
Answer 1
Answer 2
Answer 3
Answer 4
Correct answer
Correct explanation
Page id
Part of Pre-test
Part of Post-test
Immersion oil is used to view fluorescent-stained smears.
True
False
2
Immersion oil is not required to view fluorescent-stained smears as they are observed with 20x or 40x objective lens.
Yes Yes Reporting and Recording results of Smear Microscopy (On paper)
ContentEach Designated Microscopic Center (DMC) needs to maintain a National TB Elimination Program TB (NTEP) Laboratory Register which collects information of all presumptive TB patients who undergo tests or confirmed patients who undergo follow-up tests.
- After doing the Acid-fast Bacilli (AFB) test, the laboratory technician needs to ensure that all the microscopy test results are entered against the name and the serial number of the presumptive/ confirmed TB patients.
- The result needs to be mentioned in terms of positive or negative test results along with the AFB grading.
- It is expected that the positive results are written in RED and negative in BLUE point pens.
- The AFB results can be mentioned for newly diagnosed TB patients for both spot as well as morning sample and must include the Nikshay ID of the patient as well as the test date and result.
- In case, the sample is repeated, the same is also mentioned.
- All the information also needs to be entered into NTEP Nikshay online application using a tablet or mobile phone.
- In a setting where Nucleic Acid Amplification Test (NAAT) is co-located, another sample needs to be tested for Rifampicin (Rif)-resistance and the same result also needs to be noted into the TB laboratory register.
- The performance of each laboratory is also entered into the monthly DMC extract called Annexure M which is consolidated for all DMCs by the concerned Senior TB Laboratory Supervisor (STLS).
- HIV and diabetes tests are also offered to each confirmed TB case and the details of the same are also part of the TB laboratory register.
- Patients who have been tested also need to be provided with the test results in a hard copy apart from the provision of information to the treating clinician of the health facility.
Resources
Kindly provide your valuable feedback on the page to the link provided HERE
Reporting results of Microscopy (Digitally)
ContentResults of Ziehl–Neelsen (ZN) and Fluorescence Microscopy (FM) are added to Nikshay Diagnostic Module. After a patient is registered, test details are added which then leads to the page to add details on sample type, facility and test results (Figures 1-6).
Features of Nikshay Diagnostic Module
- A simplified user workflow for adding and updating test requests and results.
- Tests can be added and all the added tests’ history is available.
- Ability to map samples to one or more tests within Nikshay.
- A “Workbench” view is available to provide a single interface to view/ print/ copy the Test Summary, Add/ View Sample Details and Update/ View Result details.

Figure 1: Nikshay Screenshot to Add Tests under Diagnostics Module.
To add results for ZN/FM, the test types either Microscopy ZN or Microscopy Fluorescence should be selected from the drop-down menu (Figure 2).

Figure 2: Nikshay Screenshot to Add Reasons for Test under Diagnostics Module.
In case of follow-up with ZN/FM Microscopy, the reason for follow-up should be selected (Figure 3).

Figure 3: Nikshay Screenshot to add Follow-up ZN/FM Microscopy Test under Diagnostics Module.

Figure 4: Nikshay Screenshot to add Test Type for ZN/FM Microscopy and Facility Details under Diagnostics Module.
Details on sample type and sample description (mucopurulent/ blood-stained/ saliva) are added (Figure 5).

Figure 5: Nikshay Screenshot to add Sample Details and Description for ZN/FM Microscopy under Diagnostics Module.
Under test results, as shown in Figure 6, details of lab serial number, sample number, test date, test reported date and final interpretation of results are added based on the selection from a drop-down menu that includes options for:
- Negative
- Positive (1+, 2+, 3+)
- Positive (Scanty 1-9)
Figure 6: Nikshay Screenshot to add Test Results for ZN/FM Microscopy under Diagnostics Module.
Resources
Assessment
Question
Answer 1
Answer 2
Answer 3
Answer 4
Correct answer
Correct explanation
Page id
Part of Pre-test
Part of Post-test
What sample descriptions are added in Nikshay for ZN/FM Microscopy under Diagnostics Module?
Mucopurulent
Blood-stained
Saliva
All of the above
4
Sample descriptions (mucopurulent/ blood-stained/ saliva) are added in Nikshay for ZN/FM Microscopy under Diagnostics Module.
Yes
Yes
Generating the DMC Laboratory Register from Nikshay
ContentThe DMC lab register can be generated from Nikshay as a spreadsheet and stored electronically or printed for paper records.
Steps for generating DMC Register from Nikshay:
- Login to Nikshay Reports using your login ID and password.
- Under Reports, click on ‘Patient wise List’ and select the option for ‘DMC Register’ (see screenshot below)


Figure: Screenshot of Nikshay Reports to generate DMC Register
A few filters need to be selected to generate the register.
- First is the geographic location (State/ District/ TU/PHI); most of these are preselected.
- This is followed by a selection of the period for which the register has to be generated. This includes selection of ‘Frequency’ (either monthly or annually)of the report and the month or quarter for which the report is required.
- Click on the ‘Generate Excel’ button and it will lead you to a page from which you can download the register.
Things to remember:
- You can generate a DMC register for facilities below your login level (e.g., a district can generate a DMC register of a TB Unit or DMC of the same district. and a State can generate a register for any District under it)
- The data included in the register is based on the "Date reported" of a test.
Video fileVideo: Steps to access the DMC Register in Ni-kshay
Resource
Assessment
Question Answer 1 Answer 2 Answer 3 Answer 4 Correct answer Correct explanation Page id Part of Pre-test Part of Post-test Where do you find the option to generate a DMC Register? In Nikshay under the "Admin" tab In Nikshay under the Others tab In Nikshay Reports under the "Patient wise List" tab In Nikshay Reports under the "Reports" tab 3 The option to generate a DMC Register is available under the Nikshay reports tab under the "Patient wise List" tab. Yes Yes
Fullscreen